Our lovely teacher! <3
That was a mistake.
Emma had us cutting precise measurements and gluing and sewing and I don't remember doing all that in first grade... I'm pretty sure all we did was pick out the paper for the cover and glue it onto some cardboard... But the way we did it with Emma was much more in-depth. That's what I get for having a professional!
To help us get started, Emma had already cut the out the board for the cover. It is made from a heavy duty cardboard called "Binder's Board". She also prepared the internal pages called a Signature. It consisted of 8 pages or four sheets of paper folded in half. Thank god she did that because we would have been at the table all night!
Book making supplies:
Two sheets 12x12 paper, one signature, two pieces of binder's board 4x6 inches
1. We began by taking the paper to be on the outside of the book and measured 0.5 in. around all sides of the binder's board. The total length of the page was 11.25 in.
Measuring around the boards
2. Next we cut a 6.5 x 1.5 in. piece for the spine of the book. We used the same color as the outside of the book.
Cutting papers
3. We then cut out the paper to cover the inside of the book. Unfortunately I can't remember the measurements for the inside.
Measuring the internal cover with a template.
Gluing
4. First we glued the boards to the inside of the paper. Flip the paper over and smooth the outside with the flat edge of a knife or a bone folder. Move in circular motions so as to not push all the glue out from the sides.
5. Next we folded over the edges of the paper and glued them down. To get a nice clean corner you could fold the paper two different ways. Two of us folded down the corner of the paper first and the other two girls cut out the corners of the paper. We then folded and glued the lengths of the sides. Both corner methods worked very well. (Boy writing this is just as confusing as making it!)
Folding down the corner.
The sides all folded and glued.
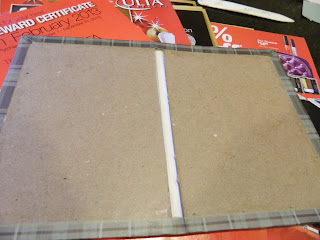
6. We then glued the center strip onto the spine and on top glued the inside cover pages and let it dry.
External paper and center strip.
The finished cover.
7. We placed our pages on the inside of the book, measured a half inch from the top and bottom of the signature, and then "eye-balled" the center and marked all three spots in pencil.
8. We held the pages very still and poked holes through the three marks right through the Signature and the cover of the book.
Poking holes.
9. The threaded needle went through the middle hole "B" first, from the outside to the inside of the book. Then up and back out through the A-hole (much giggling ensued), down along the edge of the spine into C, and then back out through B. (Confused yet?)
10. We then tied together the string ends that were left over on the outside, closed the book flat, and left it alone to dry.
Finished binding!!!
I must note that while it was drying, we placed parchment paper between the cover and the Signature to help absorb moisture from the glue, as well as we weighed down the books to help them dry in a closed shape.
After allowing it to dry for about an hour (and going upstairs to make some yummy snacks) we came back and decorated our books with stamps, markers, what have you. I left my book plain, because I like it that way; no decoration except for a date stamp.
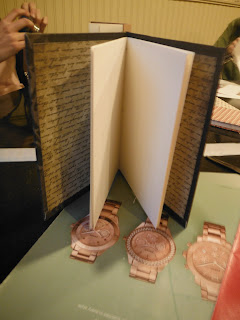
The finished product.
I hope whoever is reading this understands my nonsense. I guess I should have chosen an easier craft as the first step-by-step instructions I post, but I promise there will be some way better ones to come. I'm learning of course! Learning how to make books and how to explain crafty instructions.


No comments:
Post a Comment